Additive Technologies Lab
Annex-North 21-003

submitting 3D-print jobs
SoAD Labs manages all print jobs through 3DPrinterOS. Completed prints can be collected at the pickup station at the entry to the lab.

Submit a 3D-print job via 3DPrinterOS
lab resources
Prusa i3MK3S+ desktop FDM 3D-printers
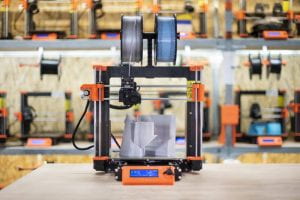
The School of Architecture and Design maintains a farm of 24 Prusa i3MK3S+ FDM 3D printers which are available to current SoAD students at no cost.
|
build volume X-axis = 240mm (9.84″) wide Please note that these dimensions are slightly smaller than the advertised specification for these machines because we allow a for a 5mm margin perimeter margin. |
 |
available materials
The school of Architecture and Design covers the cost of materials and and offers PLA filament in the color palette below. PLA is easily printed, biodegradable, does not off-gas, and is reasonably strong. This material is a great choice for representational models as well as functional parts that do not require high mechanical strength.

Polymaker Polylite PLA
HEX #F1A1AF

Polymaker Polylite Pro PLA
HEX #DC605A

Polymaker Polylite PLA
HEX #D60212

Polymaker Polylite PLA
HEX #D90102

Polymaker Polylite PLA
HEX #F36201

Polymaker Polylite PLA
HEX #EED230

Polymaker Polylite Pro PLA
HEX #F4DA78

Polymaker Polylite Pro PLA
HEX #C0DDA3

Polymaker Polylite PLA
HEX #48B9C2

Polymaker Polylite PLA
HEX #487BA2

Polymaker Polylite PLA
HEX #A8D4E8

MatterHackers MH Build Series PLA

Polymaker Polylite PLA
HEX #8B8E96

Polymaker Polylite PLA
HEX #545859

MatterHackers MH Build Series PLA

MatterHackers MH Build Series
PHASING OUT!

MatterHackers MH Build Series HS PLA

Polymaker Polylite PLA
HEX #EED1A8

MatterHackers MH Build Series Silky PLA
template file
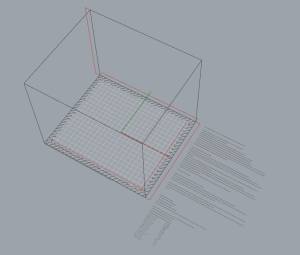
| Please use the SoAD 3D-printing template file to help you scale and layout your parts for 3D-printing. Please note that the template model units are millimeters. Be sure to convert any models that are in inches to mm or the print you receive back will be very tiny! Download the Rhino 3D-printing template |
 |
Guides
 Using PrusaSlicer with 3DPrinterOS
May 20, 2025In addition to using 3DPrinterOS' built-in slicer, you can also use PrusaSlicer to prepare 3D-print jobs. PrusaSlicer provides greater control and may be more user-friendly, especially when handling multiple objects or large files. install and configure PrusaSlicer Download the latest version of PrusaSlicer from Prusa Research and install on your machine. Follow the PrusaSlicer Configuration…by Joe Fratoni
policies
academic, personal, and professional projects
Academic projects for class and research are always prioritized.
Personal projects are allowed (and encouraged!) but will be printed after all preceding academic projects have been printed.
Professional projects (i.e. anything for-profit or on behalf of an employer) are not allowed.
multiple prints
When multiple print-jobs are queued by the same user, those jobs will be queued to a single printer and printed in succession.