Accessibility in technology is essential to provide our faculty, staff, and students the ability to navigate and use technology on our campus. From websites to software and hardware, at Wentworth we are striving to improve the tools we use to accommodate our community. Our Center for Wellness & Disability Services at Wentworth “allows students with disabilities to participate fully in the life of the community. Wentworth subscribes to the policies set forth in the Americans with Disabilities Act Amendments Act of 2008 (ADAAA) and in Section 504 of the Rehabilitation Act of 1973, which mandate equal opportunity in education programs and activities for students with disabilities.” (source: https://wit.edu/wellness-disability-services/disability-services)
Here are some examples of disabilities our community faces:
(source: http://www.siteimprove.com)
Recently, the Learning Innovation & Technology team and other departments across the college have been working such resources as the Carroll Center to undergo training, learn more about accessibility, and how it fits into our website. We also have been utilizing SiteImprove to pinpoint the errors already existing on webpages and working through to fix these.
There is so much to this topic and it can seem overwhelming to know where to start. Luckily, we are seeing more software companies implement accessibility tools within their programs to help. To educate our faculty, we want to stress the importance of implementing accessibility needs into their documents, videos, and other materials used in their classes. I have found once you learn how to make a particular document accessible and make a conscious effort to do this over time, the process becomes more and more fluid and is integrated into your regular routine.
One type of file I’d like to briefly touch on and one we use so frequently is the PDF. Adobe has a great Accessibility tool embedded into Acrobat. Open a PDF in Acrobat, use the Tools tab at the top of the window, and scroll down the page to find the “Accessibility” tool.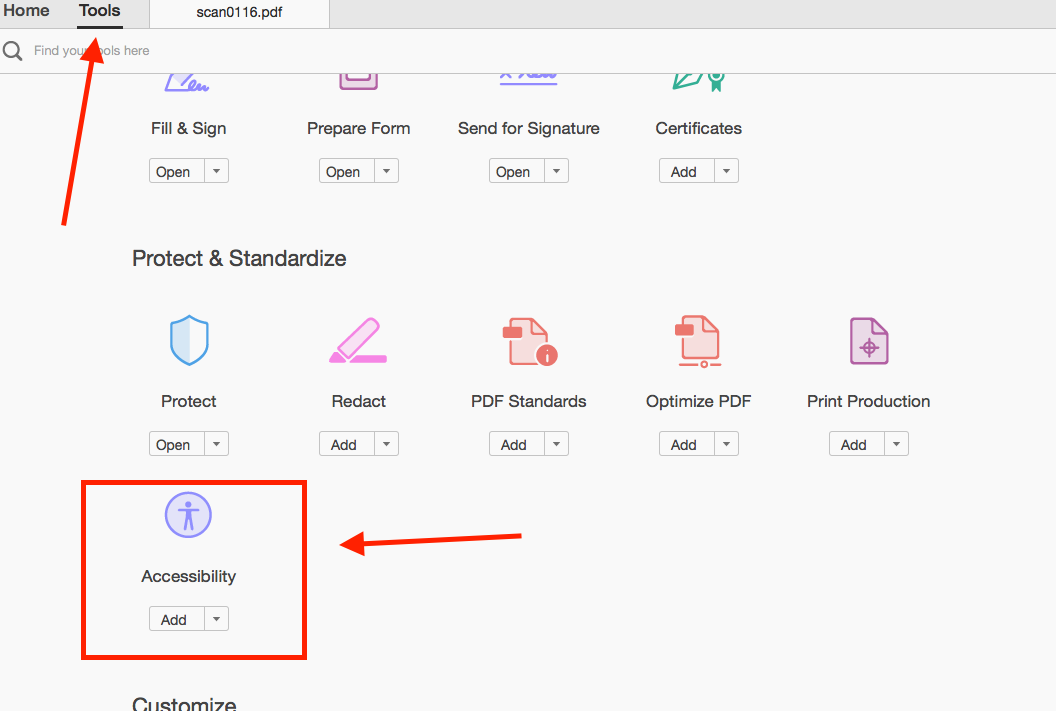
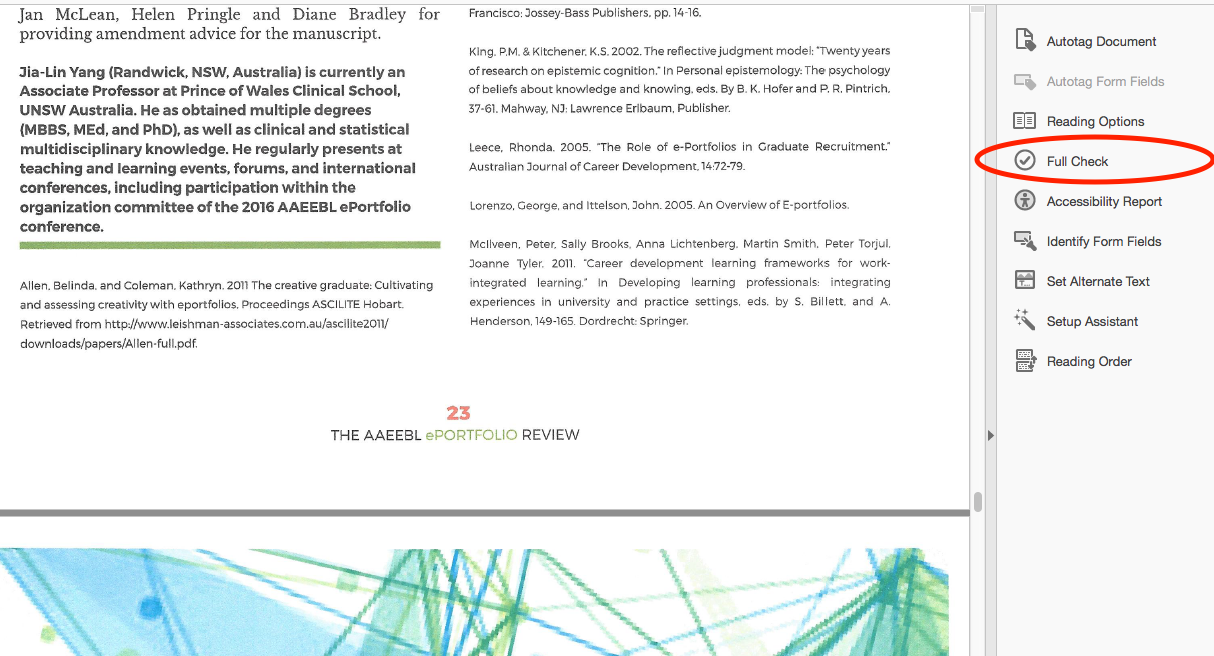
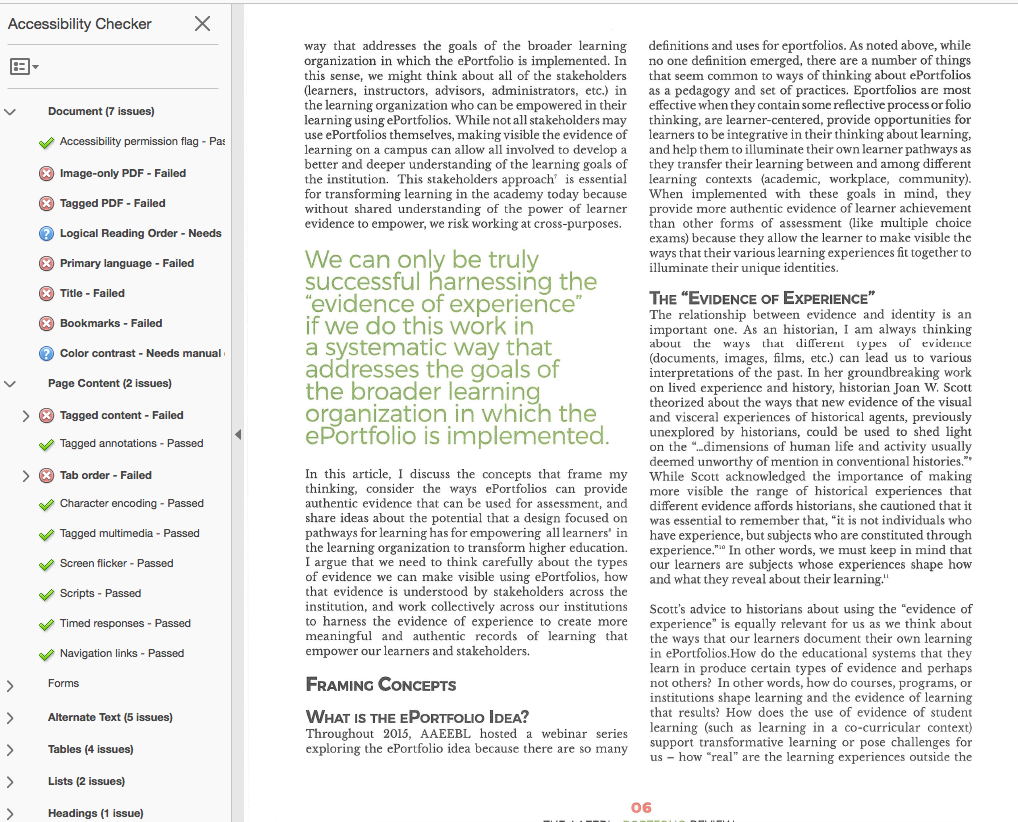
There are a lot of options to check and improve your document. The first thing I would recommend is to run a Full Check, showing all errors in the document. By right-clicking each error, you can go and fix things such as the title, alt-tags, headings, etc. I will explain what these are further below.
It may seem daunting, but a simple right click and “fix’ will allow you to fill out the necessary information while Adobe implements the rest of the work for you. As you remember to tag and title things while you’re creating a document, the fewer errors you will see on a check. So what do I mean by tag and title?
Alt tags, or alternative text, are essential for someone using a screen reader so that they can know what the image or section is about if they can’t visually see it. “This will provide a clear text alternative of the image for screen reader users” (http://accessibility.psu.edu/images/imageshtml/)
You can also Autotag your document, where it will automatically find sections and images to tag.
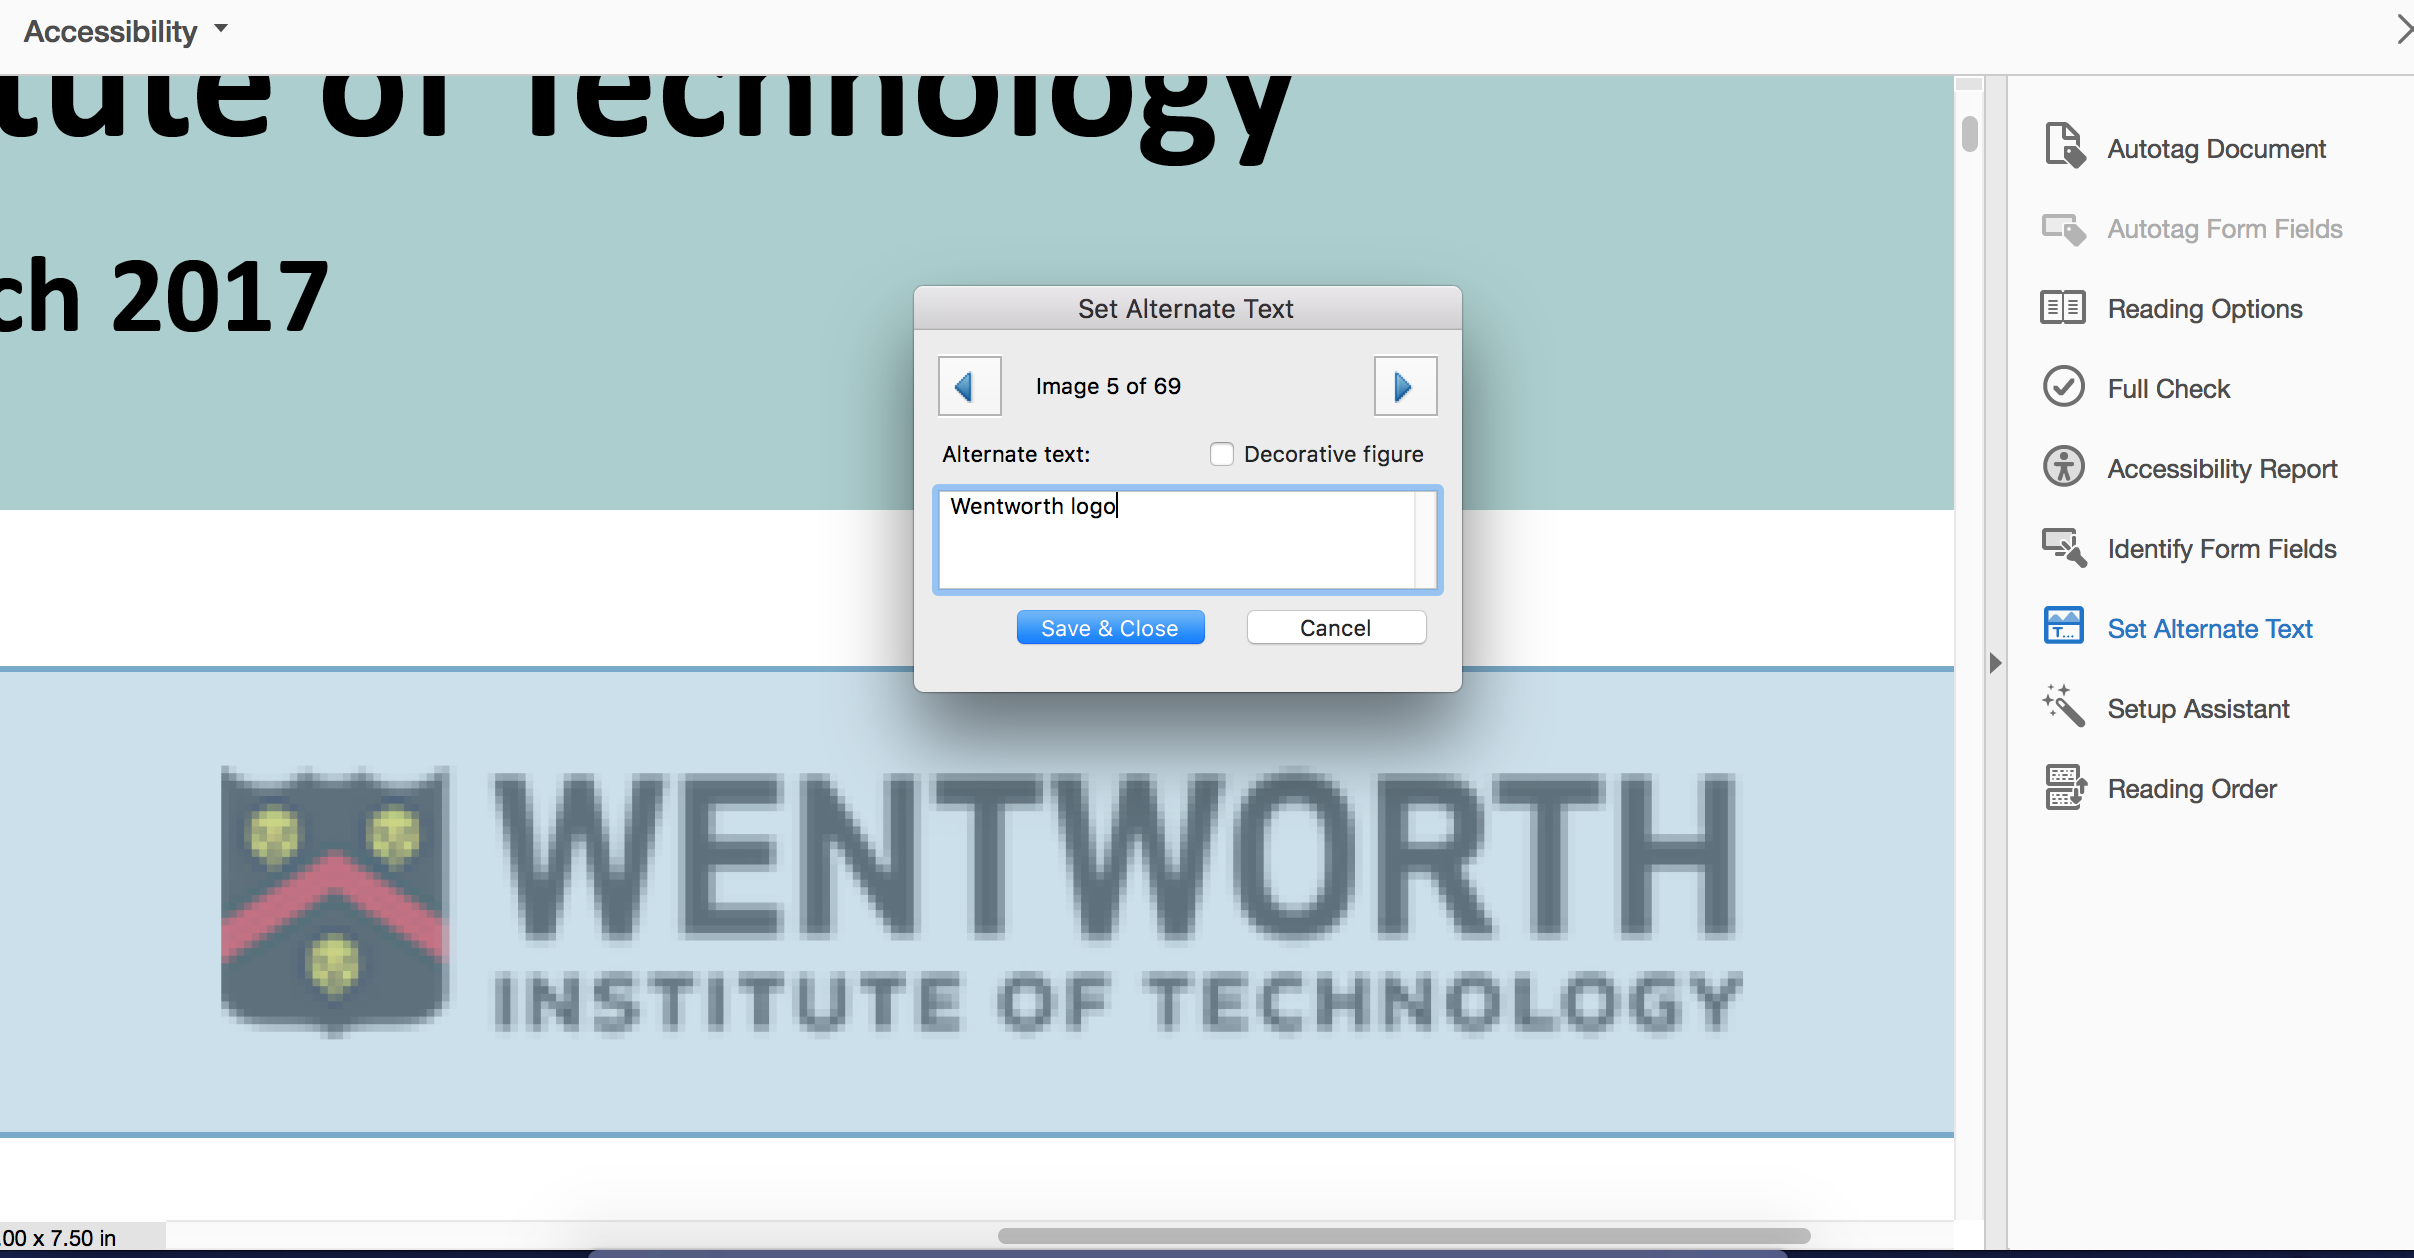
To manually set alt-tags, choose “Set Alternate Text” on the right-hand side and Adobe will guide you through the images detected. 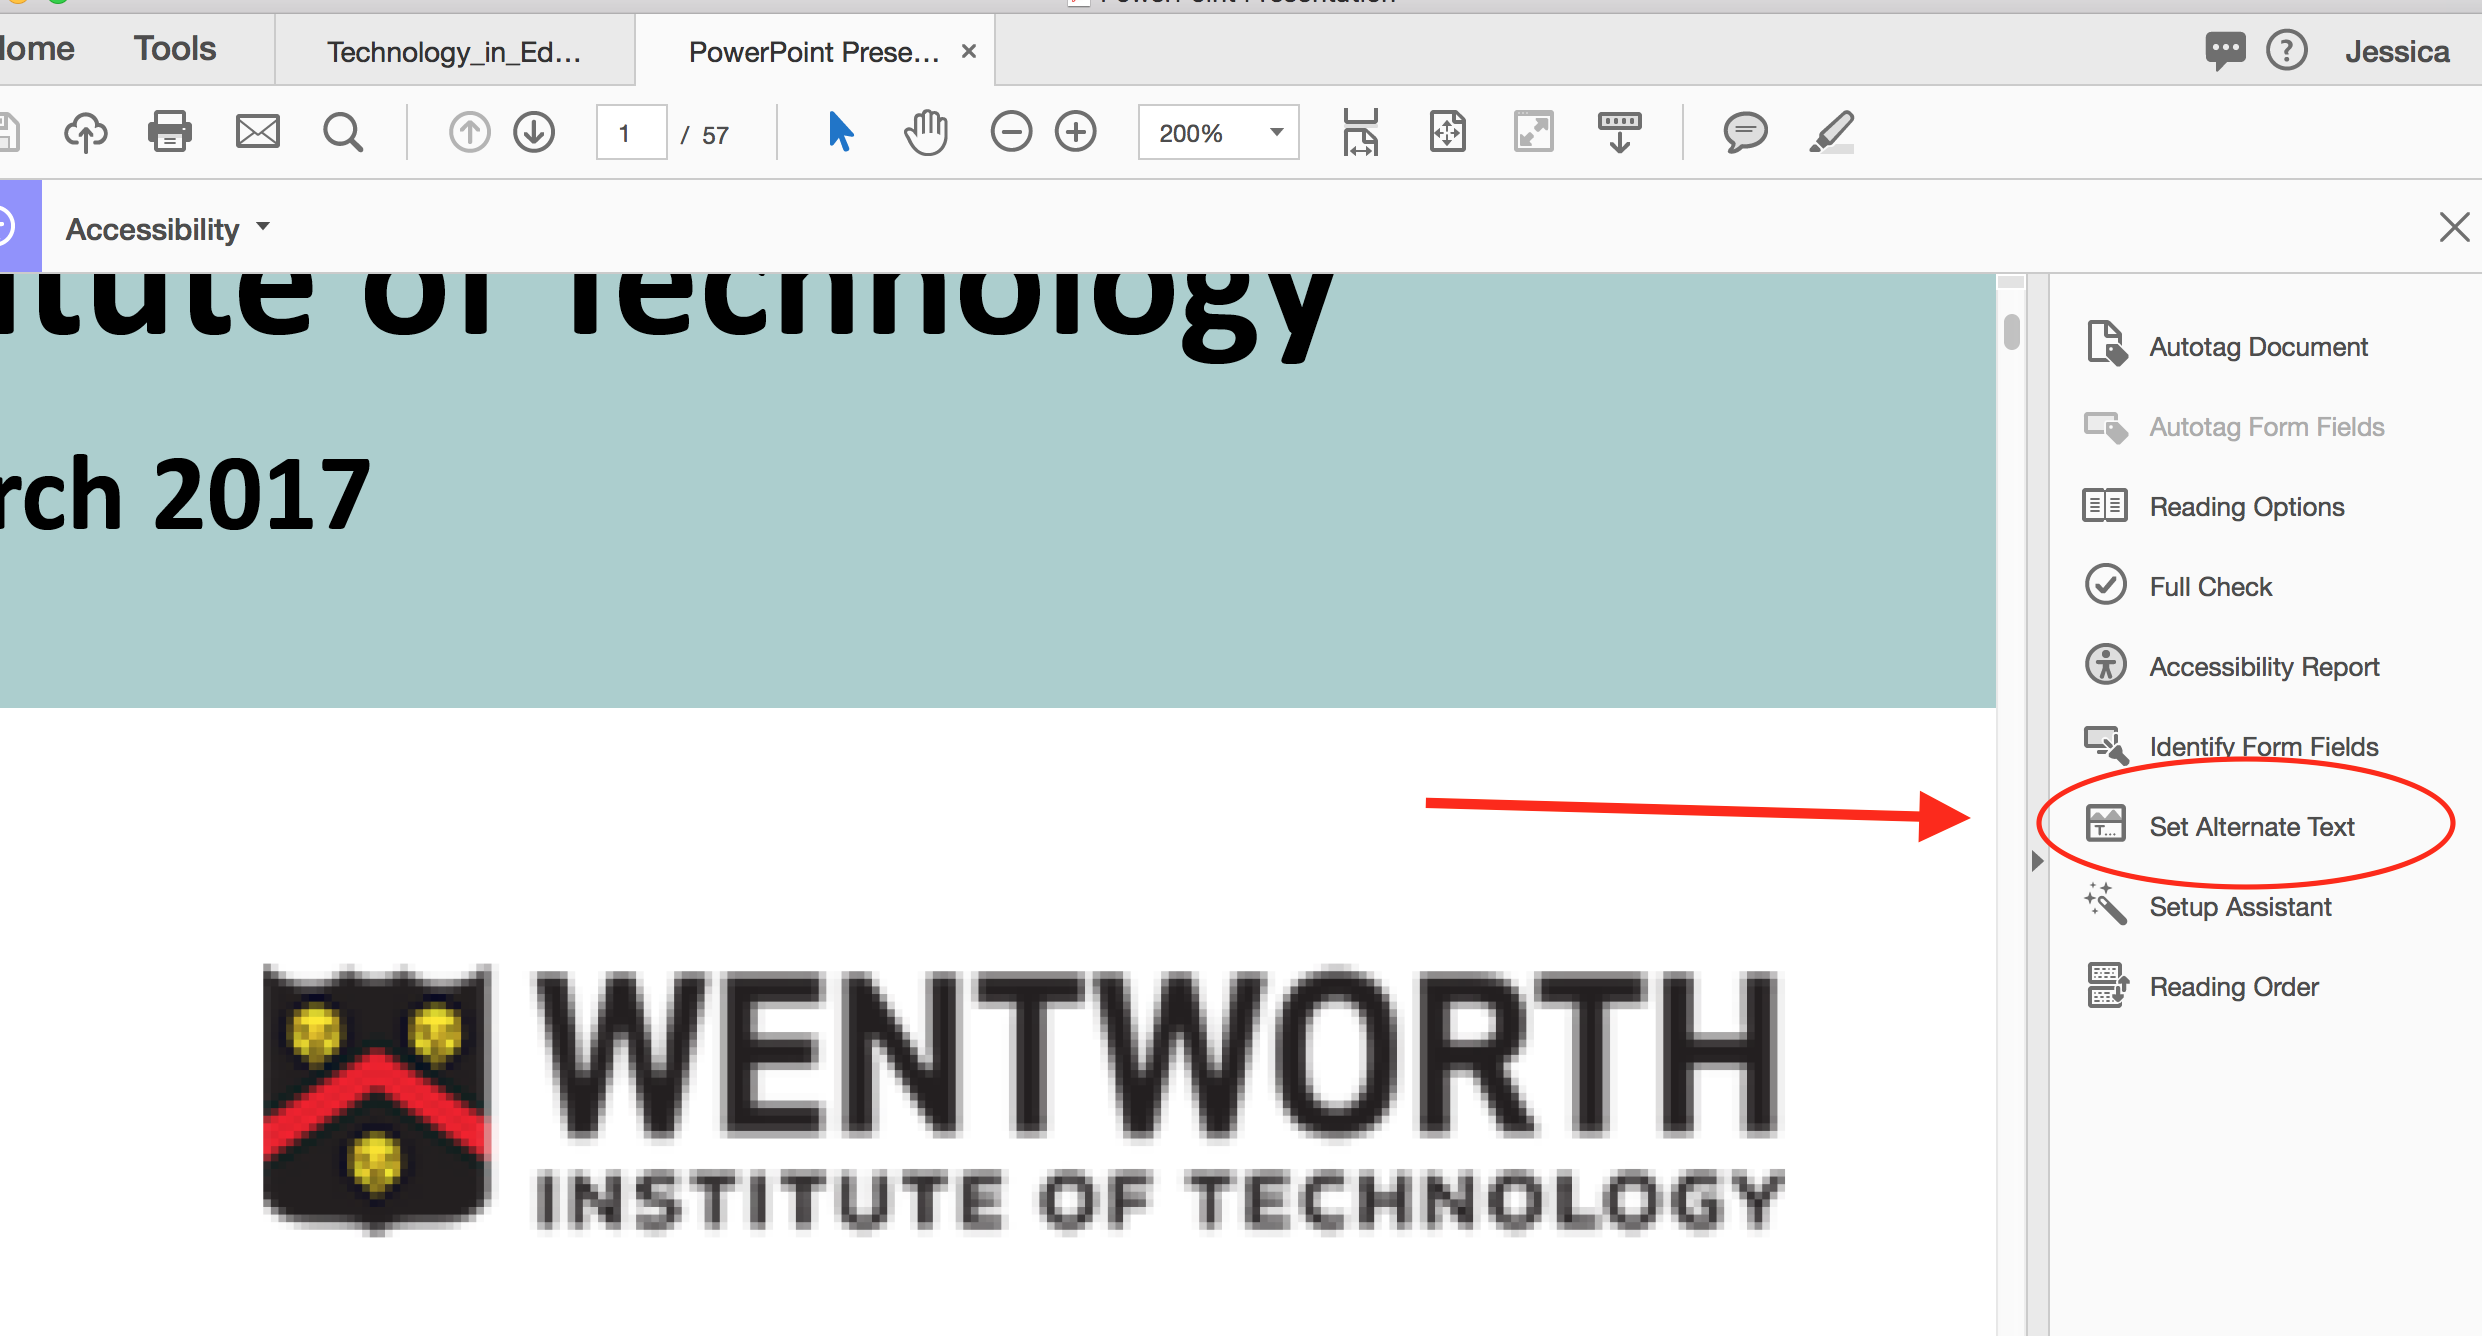
From here you can set the alternative text to the images:
If the image isn’t auto-detected, from Adobe:
- Select Figures Alternative Text in the Accessibility Checker, and choose the Options menu. Add alternate text as prompted in the Set Alternate Text dialog box.
- Use the Tags panel to add alternate text for images in the PDF.
- Open the Content panel and right-click (Windows) or Ctrl-click (Mac OS) the content that you want to mark as an artifact. Then, select Create Artifact from the context menu. (To display the Content panel, choose View > Show/Hide > Navigation Panes > Content.)
Headings are also essential in accessibility. They “allow screen-reader and assistive technology users to skim the structure of a page and navigate to or skip over sections.” (https://www.drupal.org/docs/7/creating-accessible-themes/using-headings-to-improve-accessibility)
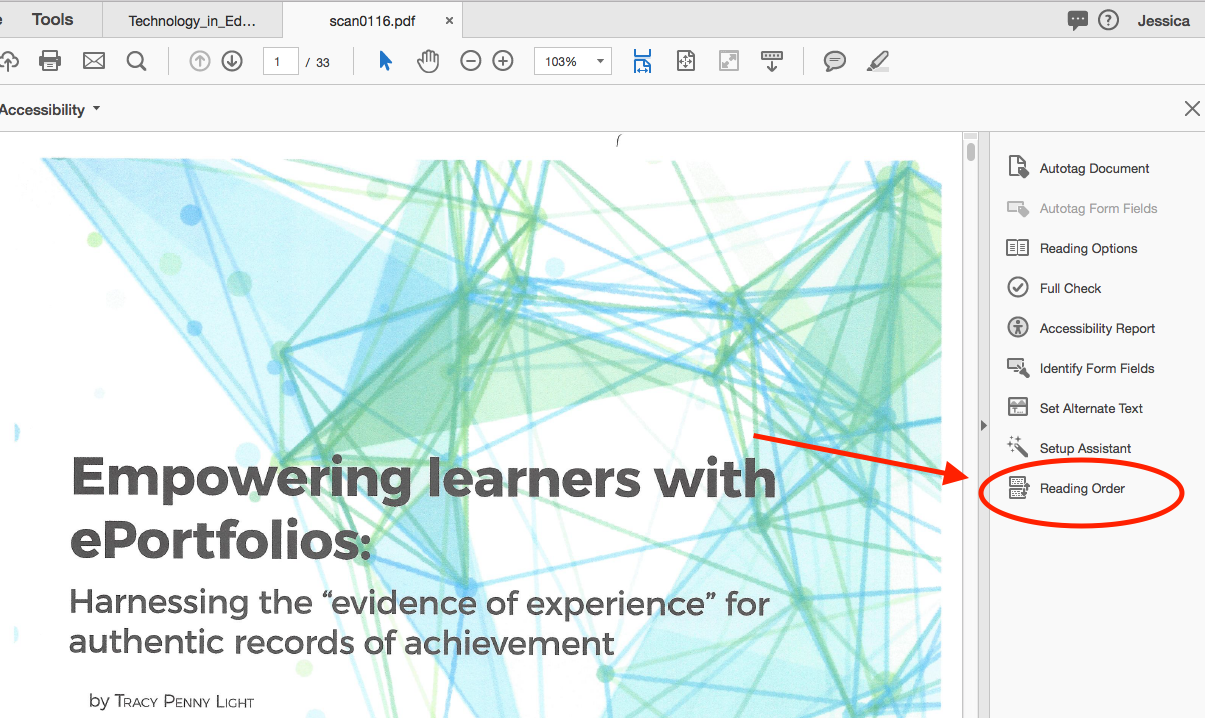
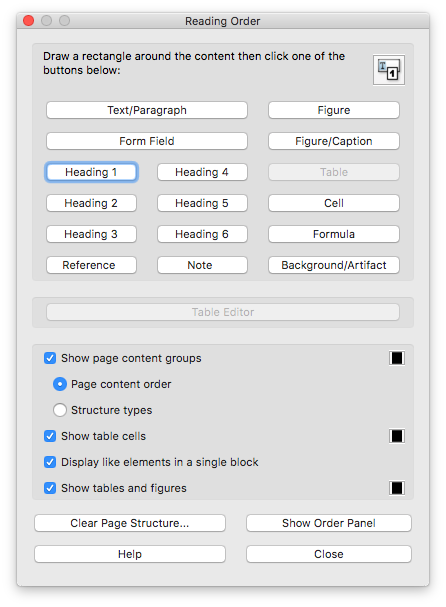
In Adobe, you can use the “Reading Order” tool and click on each artifact to designate the order of each heading.
I encourage you to read more in-depth with a step by step guide provided by Adobe on how to create and verify PDF accessibility: https://helpx.adobe.com/acrobat/using/create-verify-pdf-accessibility.html
There are also a lot of great YouTube tutorials such as this one: https://www.youtube.com/watch?v=_fIPUYEJWdI
To learn more about Web Accessibility: https://webaim.org/
To learn more about the Americans with Disabilities Act (ADA): https://www.ada.gov/
We look forward to further working with our faculty in accessibility training and awareness so that we may better serve our community on campus.

