Pool Size and Sampling in the Blackboard Testing system – Testing Best Practices Part II

In my last post, I mentioned that using random blocks of questions can result in repeated questions on an attempt. The reason behind this is that Blackboard does not track which questions have already been selected from the pool for any given test attempt. Questions are always selected from the full pool. The testing system is using sampling with replacement. This means there is a chance of the same question being chosen more than once for the same attempt (student). The likelihood of a student seeing duplicate questions depends on the size of the sample relative to the pool.

So, how large a pool do you need to decrease the likelihood of repeated questions with random blocks? To get a sense of the size of the pool needed I calculated the probability of no replication of questions for a random block of 5 questions drawn from question pools of various sizes.

Probabilities of no repeated questions in a random block of 5 questions drawn from question pools of various sizes
Question Pool Size Probability of No Repeats
10 questions 30 %
25 questions 65 %
50 questions 81 %
100 questions 90 %
200 questions 95 %

OK, these results aren’t especially surprising. As you increase the pool size you decrease the chances of having questions duplicated. But if you are pulling questions from a single pool you are going to need a lot of questions to reduce the likelihood of duplicate questions.

Is there another way?

The point of random blocks of questions is to present each student with a different set of questions on the test. If you select a single question from any given pool you won’t repeat questions on any given test. Break a larger pool of questions into a number of small pools equal to the number of questions to be drawn and draw a single question from each pool. The pools don’t need to be large, but all the questions across pools must be unique. Using this method only a few questions will be needed in each to provide variation across tests.

Using many smaller pools will require a bit more work in creating the test, however, there is an additional benefit. You can better control coverage of the test. If you create the questions in each pool on the same topic, selecting a random question from each pool ensures each student receives a question in each topic area. Using a random block of multiple questions from a large pool may result in uneven topical coverage in addition to the problem of question duplication.


Blackboard Test Best Practices

Now that we’re heading into finals in a remote setting, it’s worth reposting an old article on reducing problems during testing in Blackboard.

What can you do to reduce the problems your students can experience taking Blackboard tests? Lots, both from an instructor perspective and from a student perspective.

Instructors:

      1. Provide students with the opportunity to practice and get familiar with the Blackboard test system or to get comfortable with their knowledge of the content.
        • Have a practice test for checking settings that is set to unlimited attempts and no credit allows students to check their browsers before starting a test.
        • Create practice tests to reduce testing anxiety before an in class exam. Blackboard has a test option to allow practice tests that don’t show the results in the Grade Center. Students can take a practice test without fear that an instructor “will see their poor results.” Setting the practice test for unlimited attempts allows the students to take the test multiple times to gain confidence and identify content areas requiring additional review.
      2. When using Blackboard tests for credit, do not set the test options to be too restrictive. Rather than preventing cheating, this option can create an opportunity for gaining extra time. Do not use forced completion or auto-submit. Both options will cause headaches for you and your students! The forced completion option gives students a single attempt that they must complete in a single session. If anything happens to interrupt a test session (a browser freezing), the student can’t complete the test. The only option is for the instructor to clear the attempt, deleting any saved answers and having the student start again. Instead set a reasonable time limit. The clock starts as soon as the student opens the test and continues to run even if the student navigates away from the test. If a student has a problem, they can re-enter and resume where they left off. If you require students to notify you of any problems, you can take that into account if they go over the time limit by a small amount.
      3. Don’t get tripped up by the time of day. Blackboard considers midnight as the start of the day. When setting the start and end times for a test and you want the time to be midnight – select either 11:59 PM or 12:01 AM to be sure the exam starts or ends when you think it should. Using times on either side of midnight means you don’t have to remember how Blackboard defines it.
      4. Use pools to generate random blocks of questions to create unique tests for each student to reduce the chance of cheating.

Students:

If your instructor provides a practice test, take it before each scheduled test to make sure your browser settings will allow you to access and complete tests in Blackboard. Browser updates and plugins can affect the performance of the testing system. Since browsers are updated regularly and users add plugins to gain functions something in your set-up may have changed between tests.

See the StudentTestBestPractice Handout for a checklist.

Are Students Watching Your Videos or Learning from Your Videos?

Are you assigning videos as part of your remote teaching strategy?  If so, what are your students required to do when watching your video or what are they required to do once they’ve completed watching the video?

Faculty Focus “Teaching With Technology” says there’s a big difference between watching a video and learning something from a video.  Videos are great to watch, but you want your students to watch with a critical eye. This is where your expertise comes in.  How do you teach your students to watch videos actively?

Here are several ways on how to create interactive videos:

  1. Pose a question at the beginning of each video
  2. Include embedded questions within your videos
  3. Have student share their thoughts and interpersonal experiences
  4. Optimize by having students post their work to a discussion board

Visit Faculty Focus for more idea using videos in your teaching.

Respondus Monitor for Remote Exams

Due to the University’s decision to move classes to remote delivery for the remainder of the Spring 2020 semester in response to the COVID-19 pandemic, there is a concern for how to hold final exams.

A couple of years ago we introduced Respondus LockDown Browser to our toolkit to address exam integrity in face-to-face proctored environments. Respondus LockDown Browser is a special browser application that runs on a student’s computer that locks them into a Blackboard test or exam. The student can’t browse other websites, other parts of Blackboard, or use other applications on their computer. They can’t print the exam or copy and paste the questions into an email to send to other students.

Respondus is now offering Wentworth a two month unlimited trial of their Respondus Monitor product as their pandemic response to support us with our remote instruction. This . This tool offers an additional feature when using  LockDown Browser by providing remote monitoring of student activity during an exam. Respondus Monitor is not live proctoring in that there are no humans watching for suspicious behavior, nor are students stopped or ejected from an exam as a result of any behavior.

Instead of human proctors watching for infractions and reminding the student that the behavior is not permitted or ending the student’s exam session, the student’s exam session is recorded via their webcam and analyzed using artificial intelligence. The recording is scanned for suspicious behavior. The algorithms used to detect more than one face in camera view, the student reaching or looking outside the camera view, and turning the webcam off, among other suspicious activities. If any suspicious behavior is identified, the section of the recording is tagged for review by the instructor.

Like LockDown Browser, LIT would like to work with instructors to streamline the adoption of this tool during final exams. We’ll be running training sessions and provide outreach to help set up both LockDown Browser and Monitor for your course.

The overall process will involve importing a course package containing content items (download instructions and quizzes) into your course and then having students install LockDown Browser on their computers and taking a sample quiz. The quizzes contain items testing students on what LockDown Browser and Monitor do and some academic honesty policy guidelines.

We’re currently working on getting the rollout ready and you’ll hear more in the next week or so.

Panopto/Zoom Integration Enabled

This document will highlight how to use Panopto’s integration with Zoom.

What this means is that when you use the Cloud recording option in Zoom, it will automatically upload the recorded Zoom meeting file to your “My Folder” in Panopto.

Here is how it works…

Once the Zoom meeting recording file upload is completed, you will receive an automated email notification from Panopto confirming that your recording is ready to view.

Zoom email image

The file will reside in your personal My Folder location (in Panopto) in a subfolder titled Meeting Recordings as shown here.

You can now “move” the file to the desired Panopto provisioned Blackboard course and make the recording available to your students to view.

To move the file to your provisioned Blackboard course folder, follow these steps:

Step 1: Locate the file (recording) you want to move from the Panopto My Folder > Meeting Recordings folder.

Step 2: Check the checkbox located in the upper left corner of the thumbnail image of the file.

Step 3: Click Move from the list of options that appear at the top of the screen, once you select the file.

Step 4: Use the Drop down menu to choose the provisioned course folder.

Step 5: Once the file resides in your course folder, use the Panopto Video Embed option to embed the video in your Blackboard course website for your students to view.

What if I don’t use Panopto?

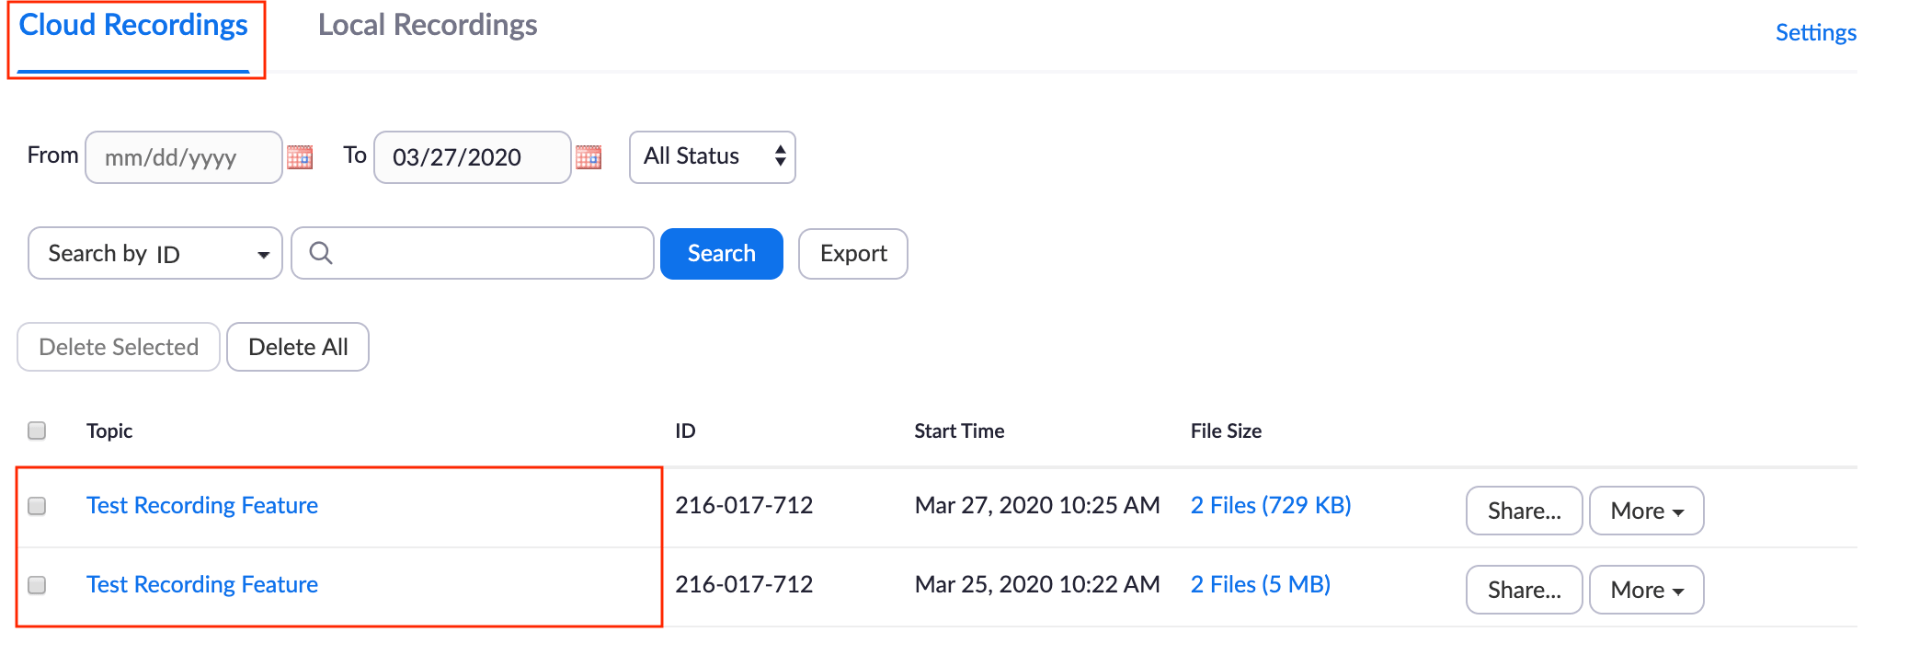
No worries.  For those of you that do not use Panopto, your Zoom Cloud recordings will still reside in your Cloud Recordings tab as always.

Once the Zoom meeting recording is completed, you will receive an email notification from Zoom confirming that your recording is now available.

You can share the link information provided in the email message with your students so that they can view the recording.

You can also access the Cloud Recordings tab in Zoom and click on the Share button and copy the Recording link Information and share with your students as well.  Either way works.

We hope you found this document helpful.  For more information about the Zoom/Panopto Integration feature, please contact LIT at lit@wit.edu.