
What Is ThingLink?
ThingLink is an award-winning education technology platform that makes it easy to augment images, videos, and virtual tours with additional information and links. Please take a moment to watch the product tour video to learn more about this exciting tool that we added to our academic technology toolkit.
Get Started
With ThingLink, Creating Interactive Content Just Got Easier!
What Is A ThingLink?
How To Create A ThingLink
Get Started Basics
1. Choose A Template: To start creating a new ThingLink, simply choose the template below or click the blue Create button.
2. Upload: You can choose files from your hard drive or select files from a variety of upload sources such as Google Drive or Canva.
3. Edit: Image tagging is the cornerstone of ThingLink. Use the blue ‘Add tag’ button in the editor to create tags.
4. Share: After you are done creating your interactive image, share your content via a link or using the embed code.
How To Embed ThingLink To A Module
Embed A ThingLink Into A Module
1. Log into your ThingLink account and go to the ThingLink you want to embed onto your Brightspace course.
2. Click the Share button, found on the top right corner.

3. From the pop-up options, choose Embed On Website.
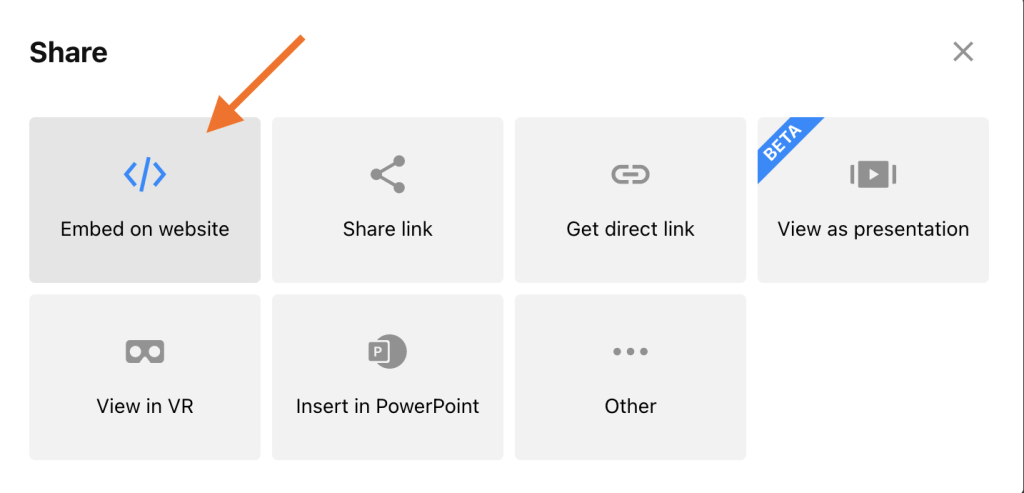
4. On the pop-up screen, click on the box next to Include web accessibility link and then click copy.

5. Go to the Brightspace course you want to embed the ThingLink file into.
6. On the navigation bar, choose the Content tool.
7. Find the module you want to embed the ThingLink into or create a new one.
8. Click the blue Upload/Create button and from the drop down list, choose Create A File.
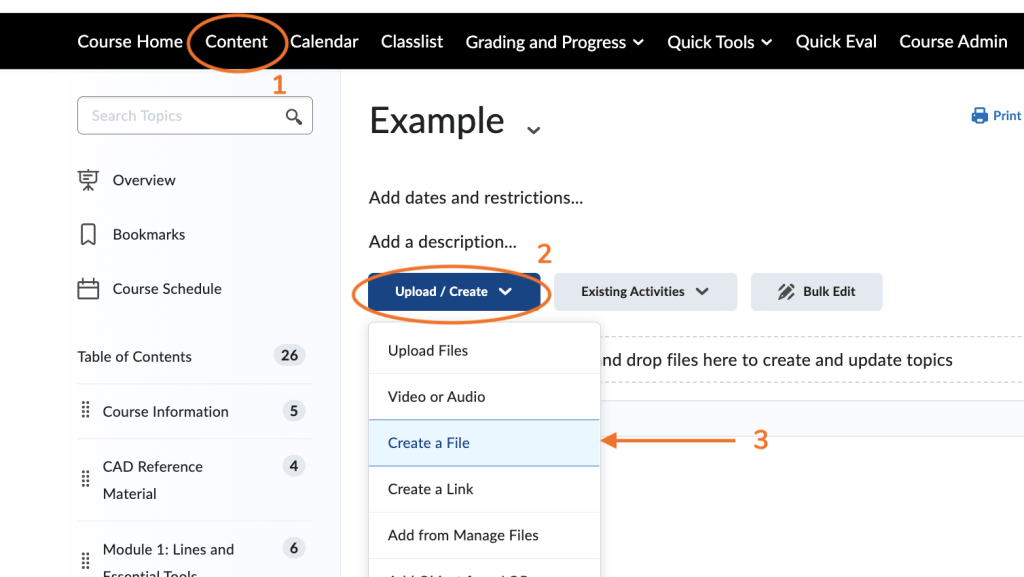
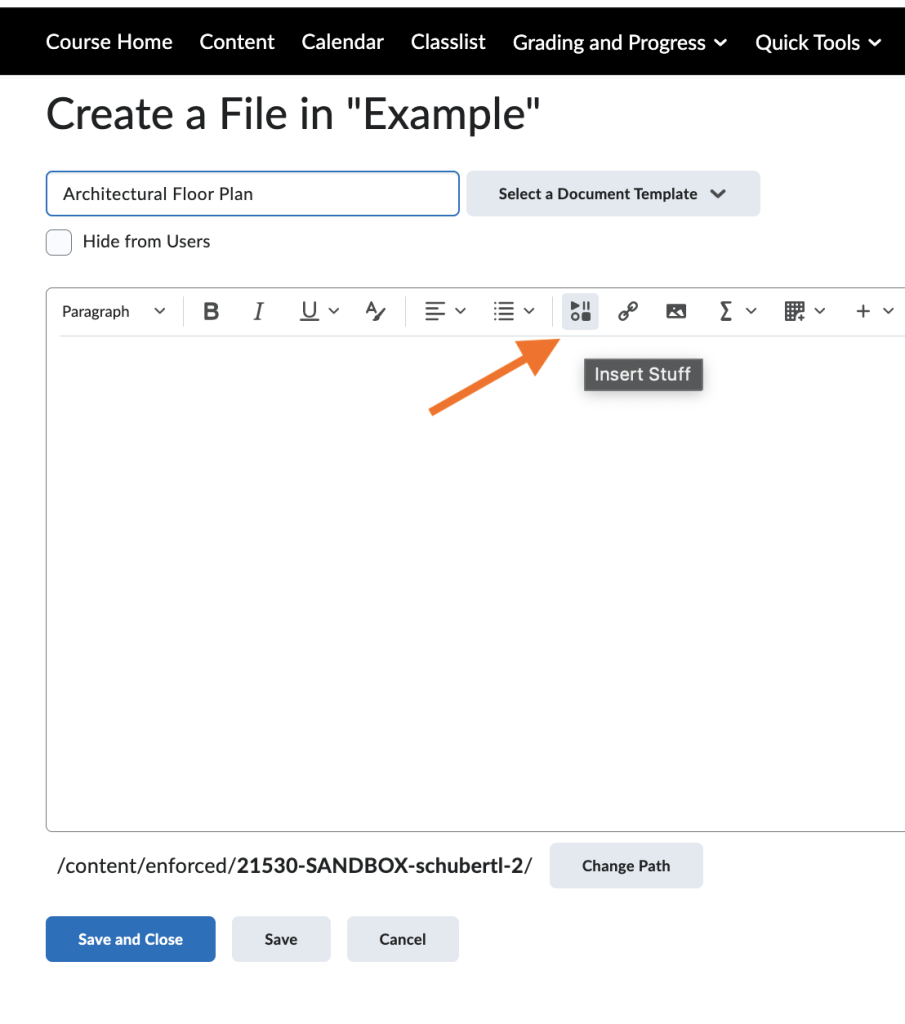
9. On the Create A File page, name the file and click the Insert Stuff button.
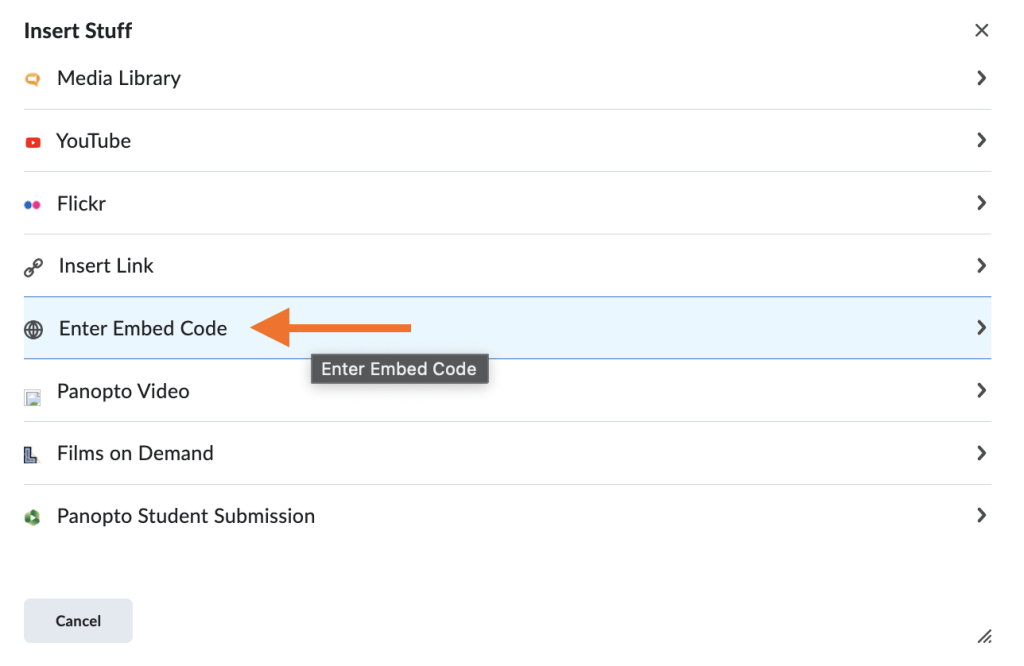
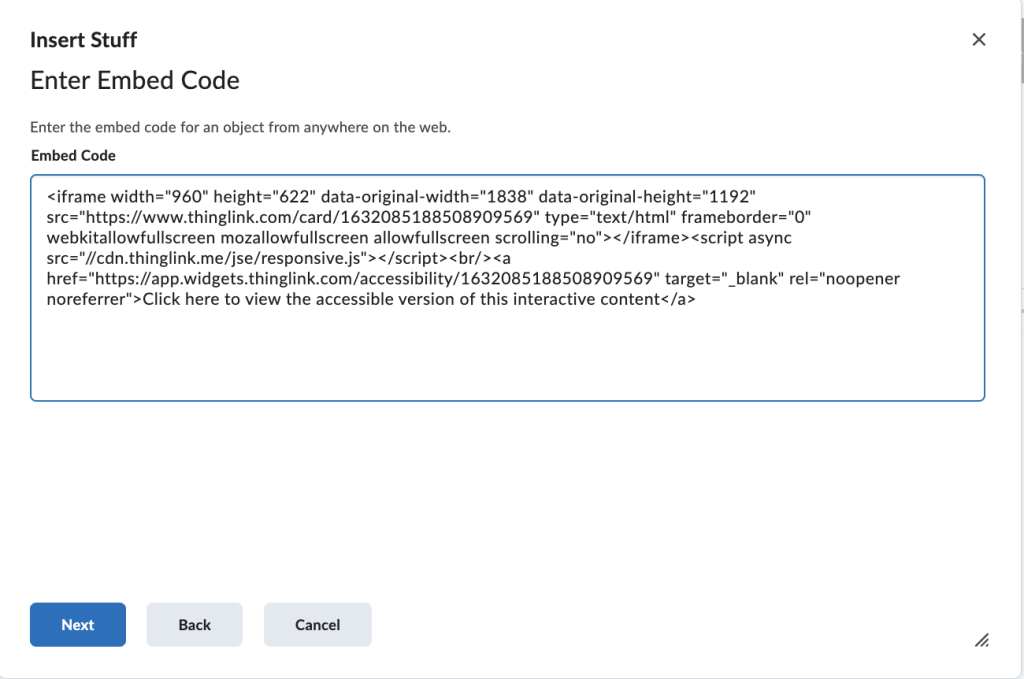
10. On the pop-up, scroll down until you see Embed Code and then select that option.
11. On the pop-up screen, paste the embed code that was copied for the ThingLink and click the blue Next button.
12. The screen will refresh with the ThingLink image and the accessible link to the ThingLink below. Click the blue Insert button.
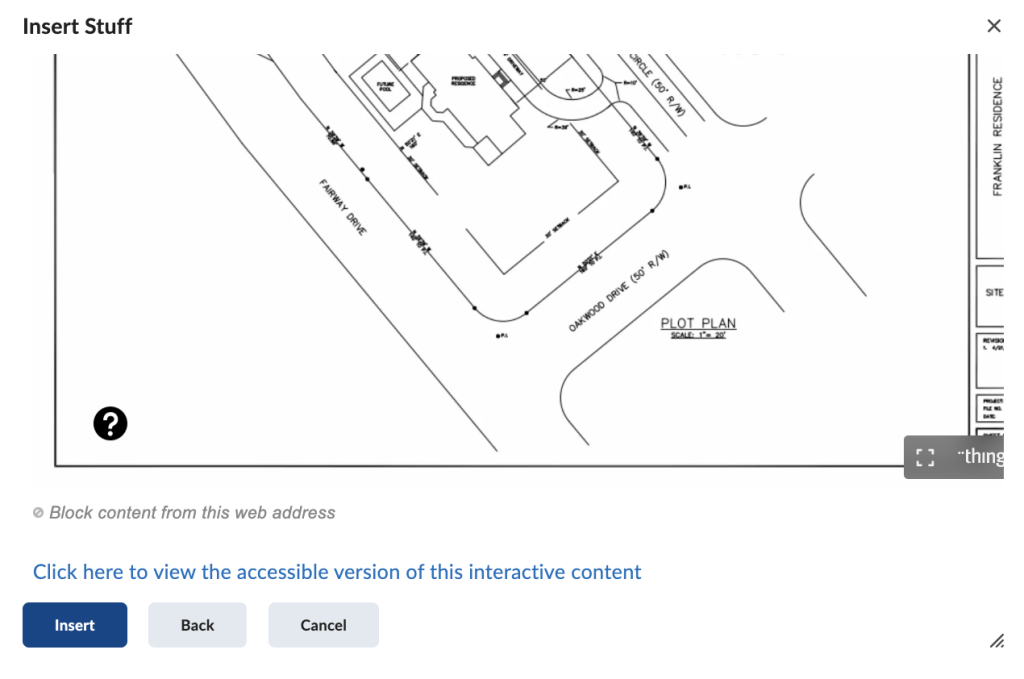
13. After it is inserted into the File you created on Brightspace, click save and close.
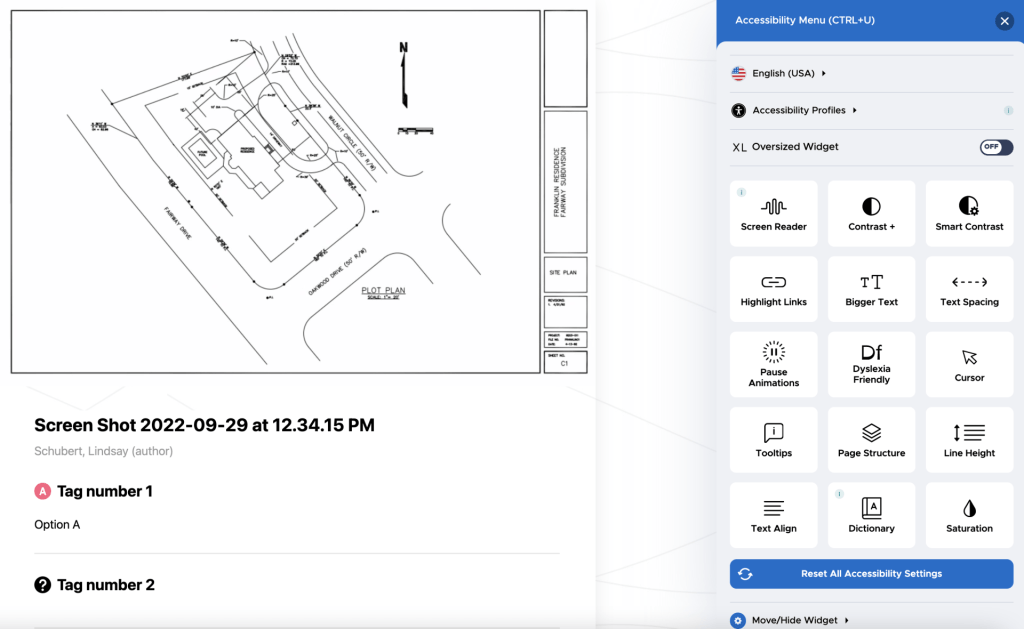
14. If you added the accessibility link, the image below will showcase what someone would see if they were too choose to view the accessible link.
Get Inspired
Easily create and share interactive images, videos, and 360° media for use in learning and teaching or even publicly. Check out the Interactive ThingLink Content Options List.
Click the black hot spots below to watch videos on some of the options ThingLink has to offer for interactive content.
