
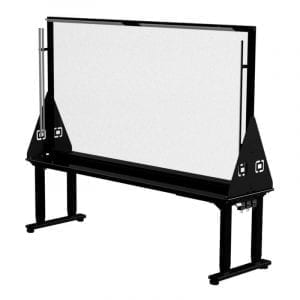
The Lightboard is located in the Accelerate Makerspace in the CEIS Building on the 1st floor.
Lightboard
If you’re interested in setting up an appointment with an Instructional Designer to discuss teaching strategies in regards to using the lightboard, schedule a consultation with TLC or if you’d like to sign up to use the Lightboard in the Accelerate Makerspace, click the button below.
What is a Lightboard?
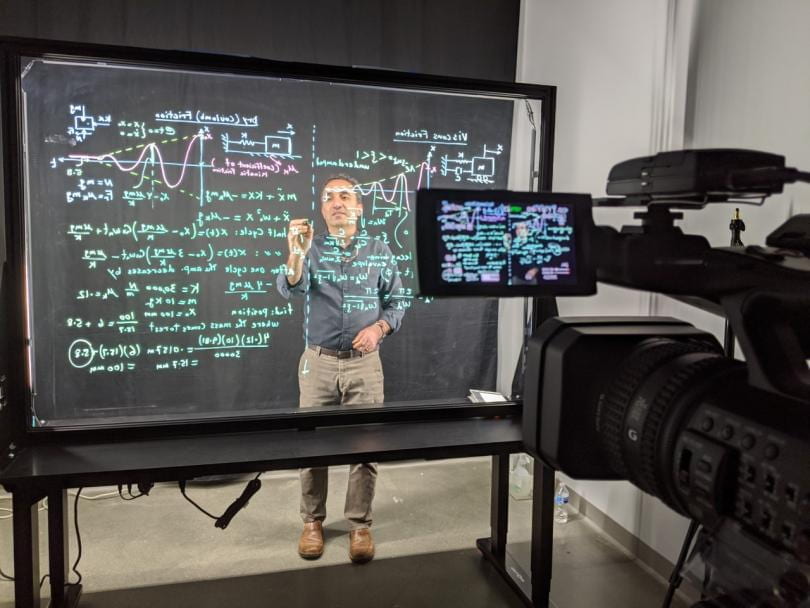
A Lightboard takes the flipped classroom and brings it to a whole new level!
It’s a natural way of teaching that keeps students engaged and allows you to focus on your lesson rather than production. With the Lightboard, you face your students, write notes, equations, formulas, schematics, etc, and your writing glows in front of you. In addition, you can include slide overlays to create highly engaging reusable videos.
TLC was inspired by the videos created by Nasser Yari, so we purchased an 82″ height adjustable Lightboard for recording compelling video lecture segments.
Get Inspired
A Lightboard can elevate the student learning experience! You can:
- Produce videos to “flip” their classroom. In a flipped classroom, students watch a video lecture before class, and faculty use class time to focus on problem solving and applications of the lecture material.
- Record tutorials for solving difficult problems or explanations of more complex topics that would otherwise take up a significant amount of class time.
- Share annotations over other visual elements to illustrate problems and processes (e.g., flowcharts, diagrams, pictures).
- Allow students to view content, control the pace of the video, and review it multiple times to learn from what faculty are teaching them.
- Upload videos to Panopto (Wentworth’s enterprise video platform) to obtain important analytical data; including potential learning gap analysis
Tips & Tricks
- Keep your lecture segments brief, focused! One topic, one board, stop. (Doubt it? See How Video Production Affects Student Engagement)
- Plan your talk so you know where you are going to be drawing on the lightboard. If you need to erase (much) or add another board, it’s probably too long.
- Set the PowerPoint slide background to black, and the page aspect ratio to 16×9 before you start. PowerPoint is not good with page layout changes later; it will stretch your slide content.
- Leave space for you.
- Try something other than the usual “bullet point talk” like adding hand-written items interspersed with just a few PowerPoint bullets. Hand-written check marks. Or cartoon sketches in an effort to limit the amount of text you write on the lightboard.
- Mark secret dots in dry-erase black, on the glass, using your PowerPoint in advance. Then you can point directly at where the overlays will reside for a polished, professional look
- Add text during the editing phase for a superimposed intro caption or a topic name, or for reinforcement or corrections.
What to Wear
- Wear medium color clothing so your writing is readable in front of your clothing – avoid white, black and dark gray. Deep blue tends to work very well.
- Avoid wearing text or asymmetrical logos – writing will be reversed in the recording.
Getting Started
Book your lightboard session and be prepared for the following:
- Pause before starting your presentation, and look at the camera. This gives you a clean entry point, to edit out your walk-on.
- When writing on the Lightboard, look at what you are writing. When talking about something on the board, point at it and look at it.
- When you aren’t writing or pointing, look directly at the camera (remember looking at the camera translates into looking at your students). It may be helpful to seat someone under the camera during recording.
- Leave yourself a window to see the camera. Or at least try not to draw horizontal lines through your eyes or mouth.
- When pointing, try to point from the side, not from the back, so that your fingers stand out against the black background.
- Don’t hold the marker when you are gesturing or pointing. Put it down, or hold it in your other hand.
- Put the marker caps somewhere else altogether. The markers will be ok without their caps for the duration of a video.
- Dry-erase and wet-erase markers squeak. To reduce squeak, use fresh markers and don’t push so hard against the glass. With a light touch, you can mostly avoid squeak.
- Don’t stand directly behind your writing – move to the side after you write it.
- Expectations for videos are higher than for classroom lectures, but you needn’t strive for perfection. Good enough is good enough.
- After your session erase with a dry cloth first, and then remove any residue with glass cleaner.