
Panopto is an enterprise lecture capture and delivery platform that allows the user to include video, audio, screen capture, slides and quizzes into a recording. All Wentworth faculty, staff, and students have the ability to create and share recordings in Panopto.
This page serves as a starting point, whether you are just getting started with your Panopto account or you’re searching for something specific.
If you cannot find an answer to your question, please schedule a consultation appointment, visit our virtual drop in hours, or email the TLC team for further assistance.
Get Inspired
What Are The Benefits Of Using Panopto In Your Classroom?
Panopto is not limited to, but can be used in the following ways:
- Record in-person class sessions
- Pre-record lectures to “flip the classroom“
- Pre-record lectures for online classes
- Create embedded quizzes in a video to assess student comprehension of material
- Facilitate active learning
- Have students create a recording for an assignment
- Upload audio or video files to share files with other users
- Create and share video tutorials
Check Out The Panopto Interface
Click on the circular blue numbers on the image to learn more about that area!
Get Started
Creating videos just got easier!
Download And Install Panopto Recorder
Now that you have provisioned your course, the next step is to download and install the Panopto Recorder. Below, we will detail how to download and install the Panopto Recorder.
Record A New Panopto Session
Now that the installation and provisioning logistics have been addressed, let’s have some fun and record a new session!
Below, we will detail how to record a new session in Panopto.
Add Closed Captioning
Add Closed Captioning
Automatic captions can be added to a Panopto video, and a transcript of a video can be downloaded.
Step by Step Instructions to Generate Automatic Captioning
1. Open the video in the Panopto Editor.
2. On the Captions tab, select the service from the drop-down
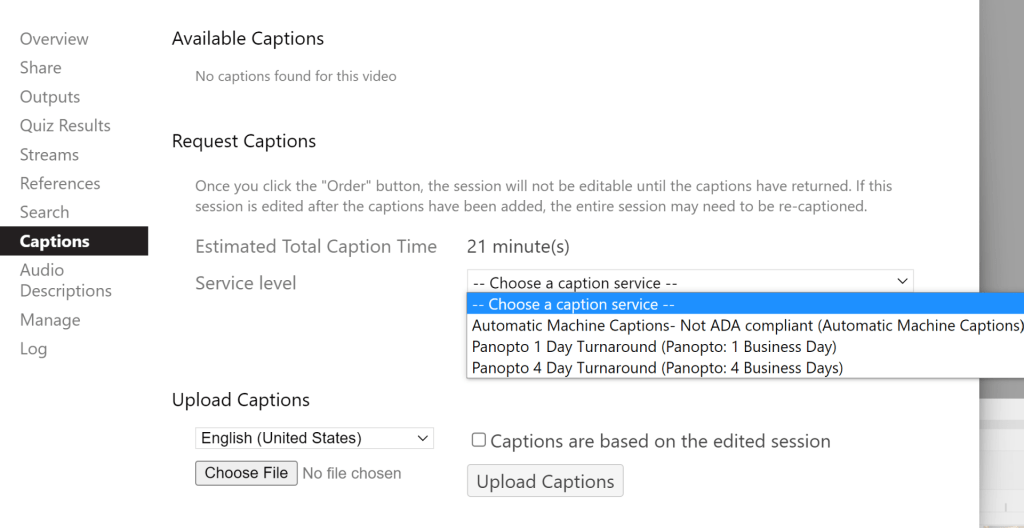
3. Click “Order”
4. Confirm order by clicking “Yes”
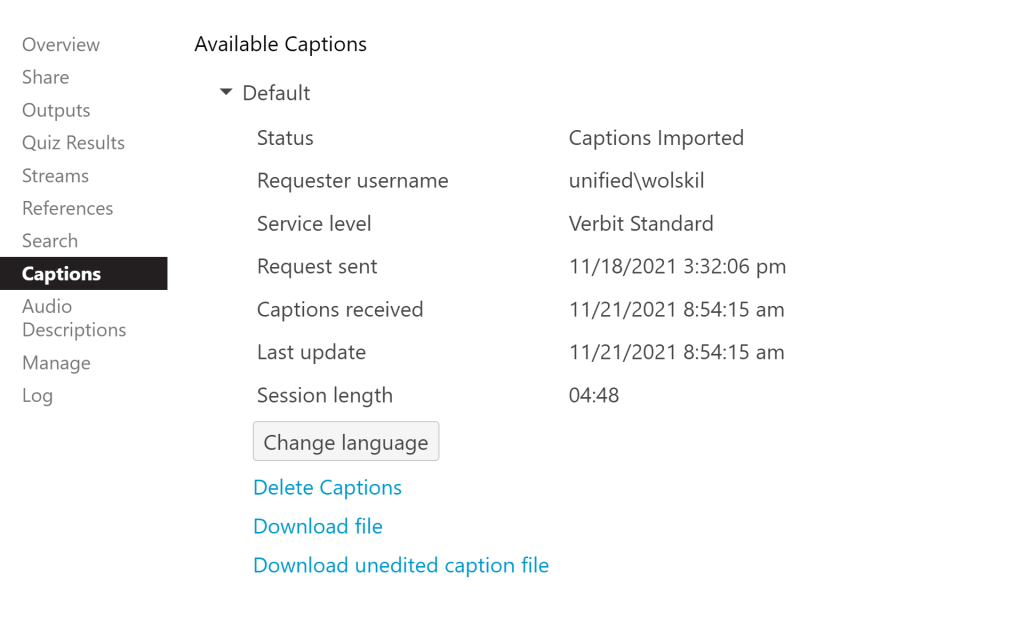
Generate a Video Transcript
1. From the course navigation bar, select Edit course.
2. Select Panopto.
3. The Panopto page for the course will open. Use the cursor to hover over the video and select Settings.
4. Select Captions
5. Under “Available Captions” select Default
6. Then, select Download File
Upload Panopto Videos to A Module
Upload Your Panopto Videos To A Module
Step by Step Instructions to Upload a Panopto Video
Step 1: Click on the Panopto Video link on your Brightspace course home page. Clicking on this link will automatically create a folder for your course.
Step 2: Return to your Brightspace course home page and click on Content from the navigation bar.
Step 3: Navigate to the table of contents bar on the left side of the screen.
Step 4: Choose the module you want the Panopto video to be uploaded to.
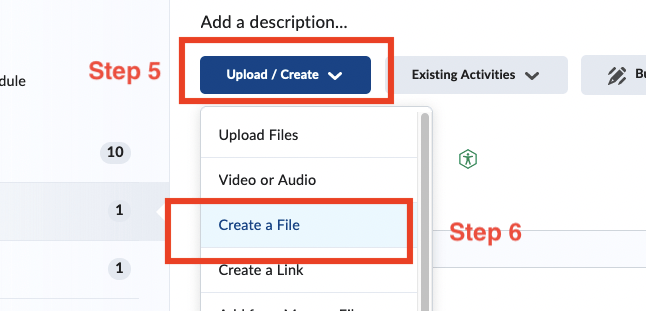
Step 5: Click the Upload/Create button.
Step 6: Select Create a File from the drop-down menu.
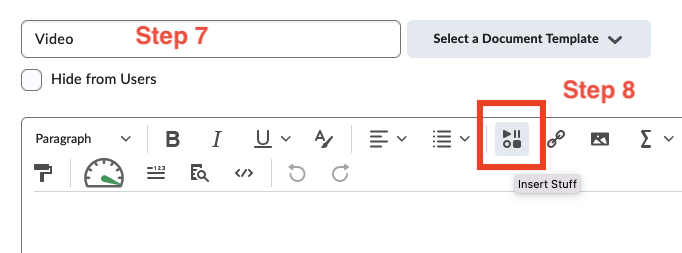
Step 7: Name the file.
Step 8: Click the Insert Stuff button.
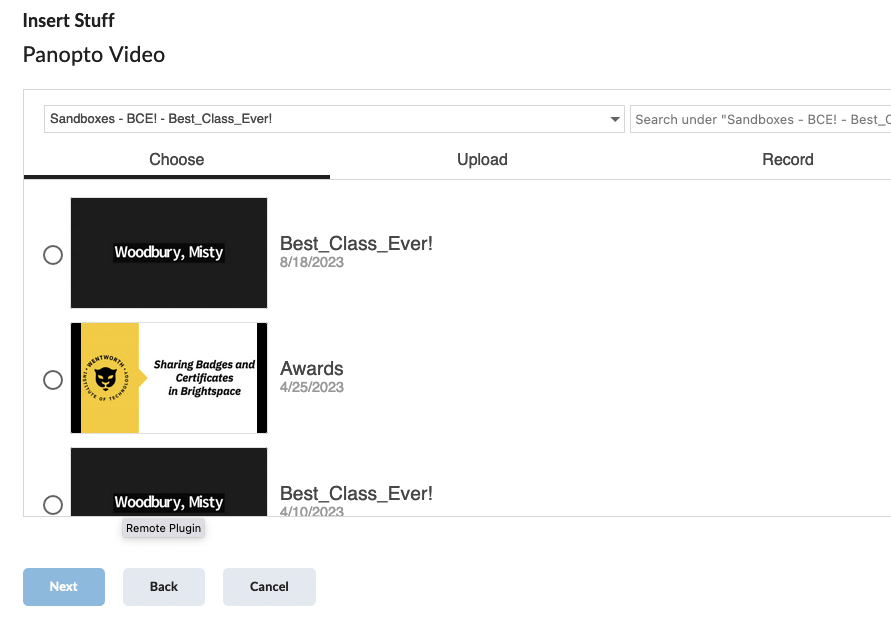
Step 9: A pop-up window will appear. Scroll down the list and click on Panopto Video.

Step 10: A new window will appear. Your course name should appear in the search bar and below it will be a list of all the videos you have added to that folder. You can also use the search bar to add videos from other course folders.
Step 11. Add your video.
a. Add an existing video by clicking on the bubble to the left of the title. OR
b. Click the Upload tab to add a new video.
Step 12: Click the Insert button.
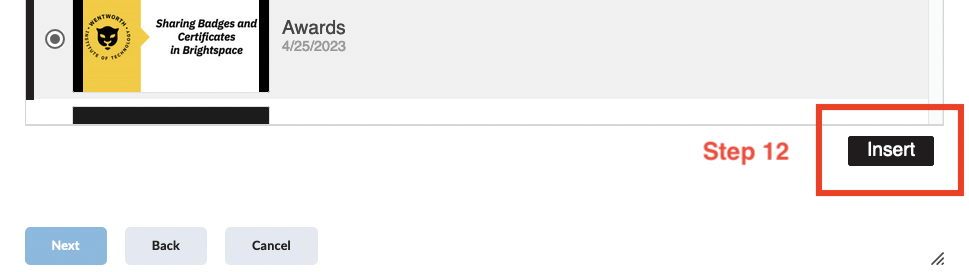
The selected video will appear for you to preview.
Step 13: Click the Insert button.
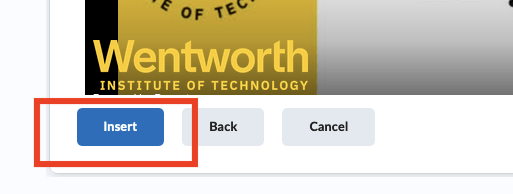
You should now see your video in the content editor widow.
Step 14: Click the Save and Close button.
Automate Adding Course Zoom Recordings to Course Panopto Folder
Setting up Zoom Recordings to Automatically be Added to a Course Panopto Folder
Note: All steps must be completed in your Brightspace course. The first part will involve setting up your recurring Zoom meeting in Brightspace and the second part will be accessing your course Panotpo folder in Brightspace.
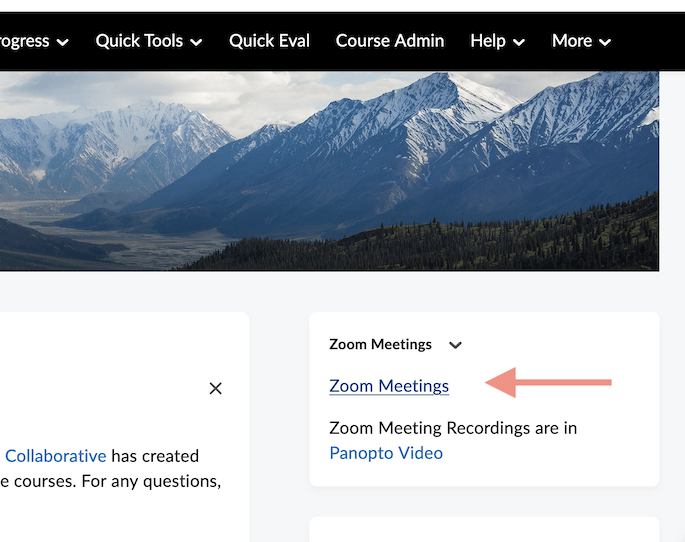
Step 1: Click on Zoom Meetings from your Brightspace course home page. A new browser window will open for you to set up your Zoom meetings.
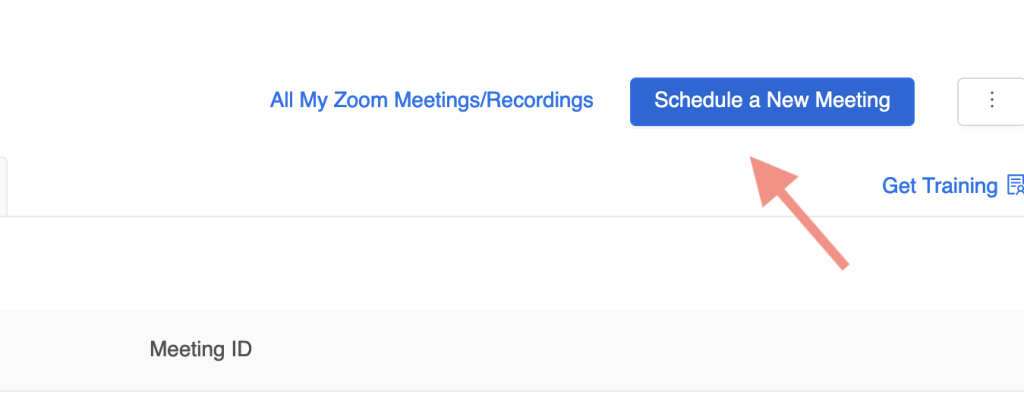
Step 2: Click on Schedule a New Meeting.
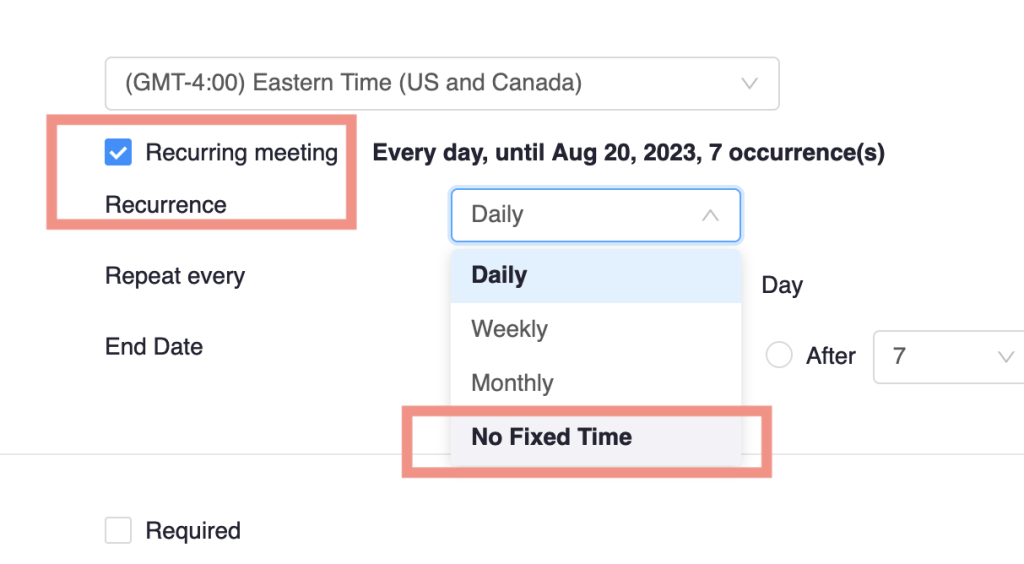
Step 3: Edit Topic and Description fields. By default, the Topic field will be your course name. If you have more than one recurring meeting (e.g., “Course Meeting” and “Office Hours”), it is best that you use a descriptive name so students know which meeting link to choose.
Step 4: Click the Recurring meeting box. A drop-down menu will appear. Select No Fixed Time (this way the link can be used at any time and you don’t need to worry about it expiring or ending at a certain time).
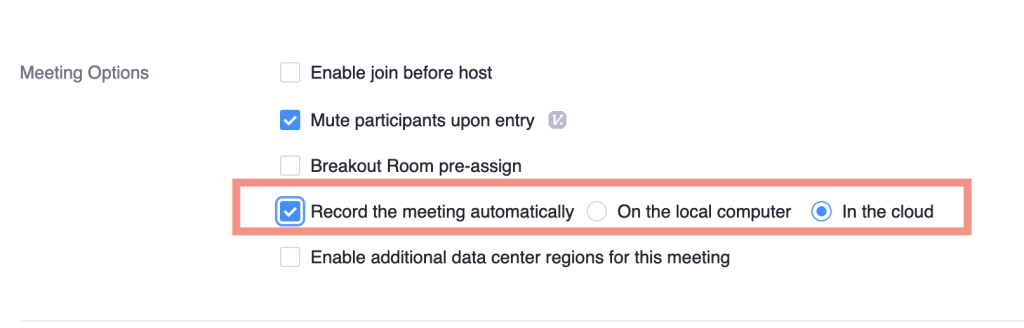
Step 5: Under Meeting Options, click the Record the meeting automatically box. Keep In the cloud selected for recordings to be automatically saved to your Panopto course folder.
Step 6. Be sure to click Save at the bottom of the window.
Step 7: Return to your Brightspace course home page.
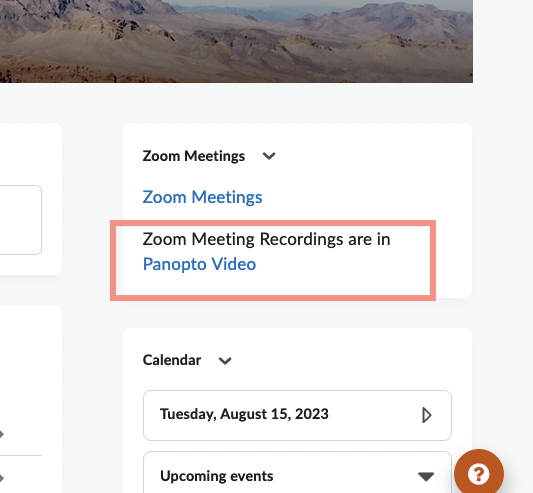
Step 8: Click on the Panopto Video link from your course home page. This will automatically provision a folder for your course and you will be able to find all Zoom meetings in this folder. Follow the instructions in Upload Your Panopto Videos To A Module to add meeting recordings to your course content.
Creating Quizzes and Video Submission Assignments
Resources for Creating Quizzes and Video Submission Assignments
Panopto allows you to create quizzes based on your video content and create video assignments where students upload video content. Click on one of the buttons below for more information.